

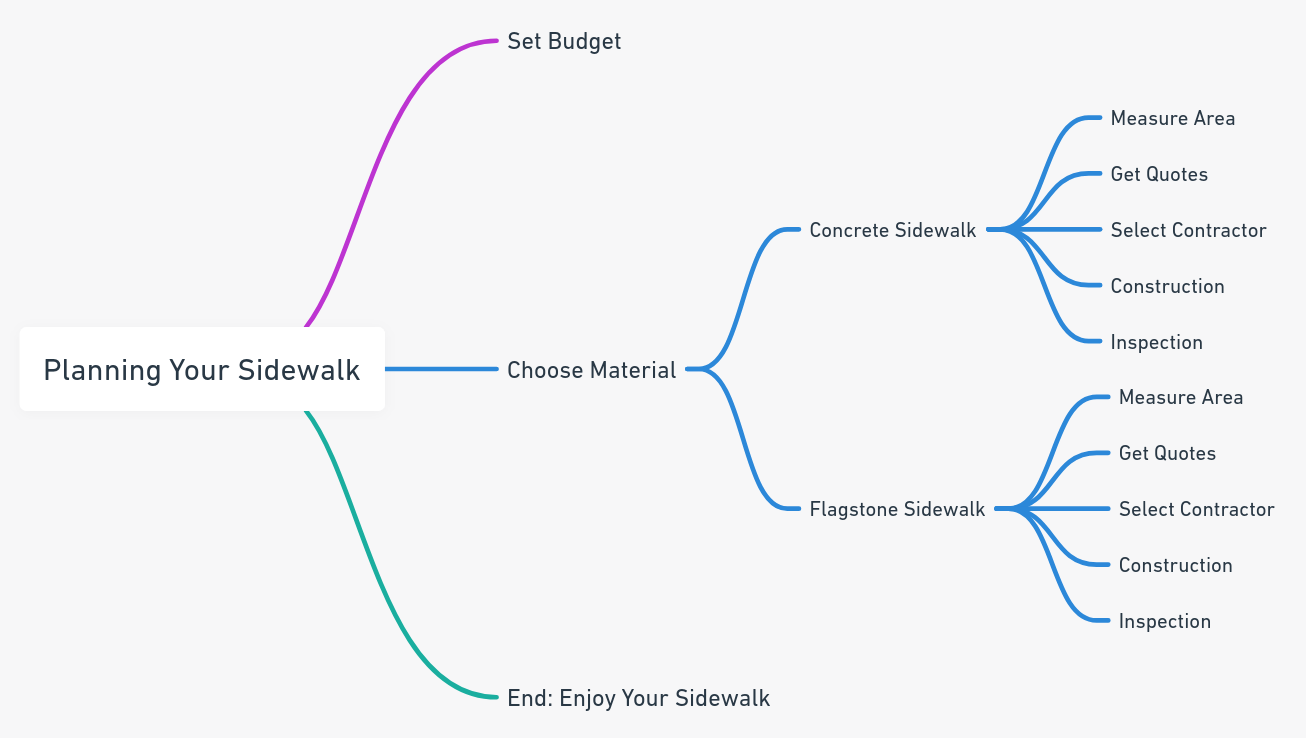
Concrete Sidewalk Installation Guide
Installing a concrete sidewalk is more than just pouring concrete into a form. It's an art that requires precision, the right materials, and a bit of know-how. In this tutorial, we'll walk you through the entire process, step-by-step, so you can install a sidewalk like a professional.
| Step | Description | Key Points |
|---|---|---|
| 1: Plan Your Sidewalk | Measure and outline the path using wooden stakes and string lines. | Consider width, length, and check local authorities for permits. |
| 2: Prepare the Ground | Dig the marked area to a depth of 4-6 inches and level the ground. | Ensure evenness and optionally add a 2" gravel layer for drainage. |
| 3: Build the Forms | Choose suitable wooden boards and align them with string lines. | Ensure boards are level and secure with stakes and screws/nails. |
| 4: Mixing and Pouring Concrete | Prepare a precise concrete mix and pour it into the formwork. | Ensure correct cement, sand, aggregate, and water ratio. Avoid overwatering and rushing. |
| 5: Smoothing and Finishing | Use a concrete float for initial smoothing and an edging tool for edges. | Ensure uniform smoothness, well-rounded edges, and cleanly cut control joints. |
| 6: Curing the Concrete | Allow the concrete to harden and strengthen by maintaining adequate conditions. | Ensure optimal temperature and moisture for at least 24 hours, ideally up to a week. |
| 7: Seal the Concrete | Apply a concrete sealer to protect against elements and enhance appearance. | Ensure the concrete is clean and follow the sealer manufacturer's instructions. |
Materials You'll Need
- Concrete mix
- Wooden stakes
- String lines
- Measuring tape
- Shovels
- Wheelbarrow
- Concrete float
- Edging tool
- Groove cutter
- Rubber mallet
- Level
- Safety gear (gloves, goggles)
Step 1: Plan Your Sidewalk
First things first, you need a plan. Measure the area where you want your sidewalk to go. Use wooden stakes and string lines to outline the path. Make sure to consider the width and length, as this will determine how much concrete you'll need.
Pro Tip: Always check with local authorities for any permits or regulations.
Step 2: Prepare the Ground
First things first, grab that shovel and start digging within the area you've marked with stakes. You're aiming for a depth of about 4-6 inches. Why this specific depth, you ask? Well, it's the sweet spot for ensuring your concrete has a solid foundation while also allowing room for other layers like gravel or rebar.
Leveling the Ground
Once you've dug up the area, it's time to level the ground. Use a long level or a straight board to check the evenness. If you find any high spots, dig them out. For low spots, feel free to add some soil. A level ground is crucial for the even distribution of weight,
| Action | Depth | Notes |
|---|---|---|
| Digging | 4-6" | Remove grass and topsoil |
| Leveling | N/A | Use a level for accuracy |
| Gravel Layer | 2" | Optional, for poor drainage |
Step 3: Build the Forms
Alright, you've staked your claim and prepared the ground. Now it's time to give shape to your concrete sidewalk. Enter stage right: wooden forms. These bad boys are the molds that will hold your concrete in place as it sets. Let's get to it!
Choosing Your Wooden Boards
Choosing your wooden boards is a crucial step in building your sidewalk forms. The type of wood you select can make a significant difference in both the durability and cost of your project. Plywood and 2x4s are generally good choices, offering a balance between sturdiness and affordability. Plywood is often favored for its lightweight nature and cost-effectiveness, while 2x4s are known for their robustness and ability to withstand the pressure of wet concrete. When selecting boards, look for ones that are knot-free and straight to ensure structural integrity. The thickness of the board is another factor to consider; a minimum of 3/4-inch thickness is usually recommended for plywood. You'll also need to think about the dimensions of the boards based on your sidewalk's layout, and don't forget to account for additional supplies like screws, nails, and stakes. If you're concerned about longevity, pressure-treated boards offer resistance to moisture and insects, although they come at a higher cost. For those mindful of environmental impact, opting for wood certified by organizations like the Forest Stewardship Council can be a sustainable choice. Always consult local building codes to make sure your chosen material is compliant. If you plan to reuse the boards, applying a sealant can add an extra layer of durability. These boards will line the perimeter of your sidewalk, acting like the walls of a mold, so choosing the right type is essential for a successful project.
Aligning with String Lines
Remember those string lines you set up in Step 1? Time to make them earn their keep. Align your wooden boards along these lines. This ensures that your concrete sidewalk will be as straight as an arrow—or as curvy as you designed it to be.
Leveling and Securing the Boards
Grab that level again; we're not done with it yet. Place it on top of your boards to make sure they're even. Any tilt could result in an uneven sidewalk, and let's be honest, nobody wants that. Once you're satisfied, secure these boards in place with wooden stakes. Hammer the stakes into the ground on the outside of the boards, and then screw or nail the boards to the stakes.
Tools and Their Purposes
| Tool | Purpose |
|---|---|
| Level | To ensure the boards are even |
| Wooden Stakes | To secure the boards |
| Hammer & Nails/Screws | To attach boards to stakes |
Double-Check Your Work
Before you give yourself a pat on the back, double-check your work. Make sure the boards are secure and level. The last thing you want is for them to shift when you pour the concrete. That would be a real party foul.
Step 4: Mixing and Pouring the Concrete for Your Sidewalk
The act of mixing and pouring the concrete is a pivotal moment in your sidewalk construction journey. The quality of the concrete mix you prepare will directly influence both the longevity and the overall cost of your project. Following the manufacturer's guidelines to the letter is not just a recommendation—it's a necessity for achieving a mix that offers the right balance between strength and workability.
- Setting Up Your Mixing Station: Just as you would carefully select the location for your sidewalk, the choice of where to mix your concrete is equally important. A flat, debris-free area close to your work site is ideal.
- Precision in Measurement: The ratio of cement, sand, aggregate, and water must be exact, as specified by the manufacturer. This is not the time for guesswork; precision ensures a mix that will stand the test of time.
- The Mixing Process: Load your concrete mixer with the ingredients in the sequence advised by the manufacturer. Allow the mixer to do its job until you have a uniform, lump-free mixture.
- Consistency Check: A slump test is your go-to method for assessing the mix's consistency. If adjustments are needed, this is the time to fine-tune the water content.
- Pouring the Concrete: Initiating the pour at one end of the formwork, use a shovel or a concrete rake to distribute the mix evenly. This is a delicate operation that sets the stage for the final appearance of your sidewalk.
- Finishing Touches: Employ a screed for leveling and a float for smoothing. These tools help eliminate air pockets and ensure a surface that's as flat as it is strong.
- Time is of the Essence: Concrete waits for no one. It begins to set within hours, so while haste is to be avoided, dawdling is equally detrimental.
List of Common Mistakes to Avoid
- Overwatering the Mix: An excess of water is the enemy of strength. A waterlogged mix will yield a fragile final product.
- Rushing the Pour: Speed is not your ally here. A hurried pour can result in an uneven surface and compromise the structural integrity of the sidewalk.
- Ignoring the Weather: Mother Nature can be unforgiving. Extreme temperatures can wreak havoc on the curing process, so it's crucial to take the weather into account.
Just as the right wooden boards act as the mold for your sidewalk, the quality of your concrete mix serves as the substance that fills it. Both are integral to the success of your project, and neither should be compromised.
The Slump Test
The slump test is a simple procedure used to measure the workability or consistency of fresh concrete. It provides an indication of how the mix will behave when it's placed in the formwork. Here's a brief overview:
A cone-shaped mold, known as a slump cone, is filled with the fresh concrete mix in three equal layers. Each layer is tamped down a specific number of times to remove air bubbles. Once the cone is filled, it's carefully lifted, allowing the concrete to "slump" or settle. The difference in height between the mold and the highest point of the slumped concrete is measured. This difference, in inches or millimeters, is the "slump value." A higher slump value indicates a wetter mix, which might be too fluid and weak. A lower slump value suggests a stiffer mix, which might be difficult to work with and could result in an uneven surface or air pockets. If the slump value doesn't align with the recommended range for your project, adjustments to the mix are necessary. Typically, this involves fine-tuning the water content. Adding water increases the slump (making the mix wetter), while reducing water decreases the slump (making the mix stiffer).
The slump test is a vital tool in the concrete worker's arsenal. It ensures that the mix is just right—not too wet, not too dry, but perfect for the task at hand. If the test reveals that adjustments are needed, it's crucial to act promptly. The right consistency is essential for both the structural integrity and the finish of the concrete structure.
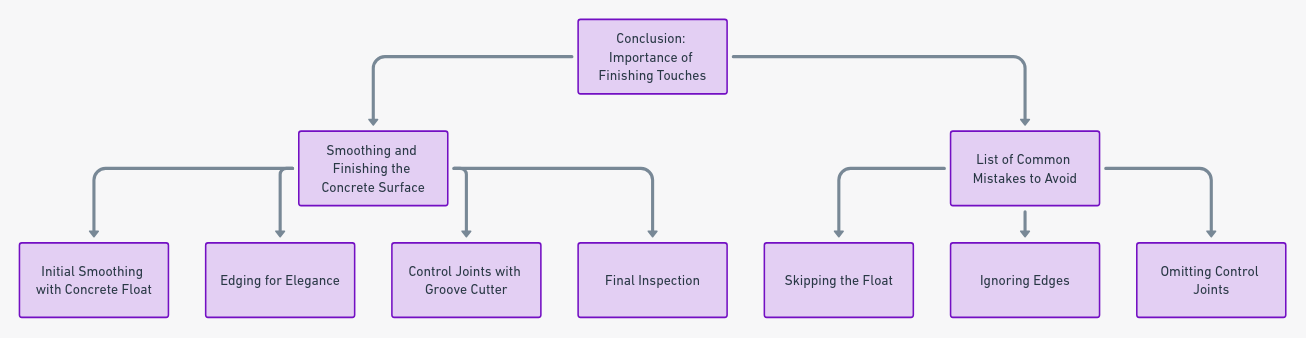
Step 5: Smoothing and Finishing the Concrete Surface
The smoothing and finishing phase is the final touch in crafting your sidewalk, and it's far from a mere formality. The tools and techniques you employ here will determine not just the aesthetic appeal of your sidewalk, but also its resilience against the elements and the test of time. A concrete float and specialized edging tools are not optional; they are essential instruments that contribute to the overall quality of your project.
- Initial Smoothing: As the concrete begins to set, take your concrete float and glide it over the surface. This action serves to eliminate any imperfections and air bubbles, leaving behind a smooth, even layer.
- Edging for Elegance: An edging tool is your next go-to. Use it to craft rounded edges along the perimeter of the sidewalk. This isn't merely for visual appeal; rounded edges are less prone to chipping and wear over time.
- Control Joints with a Groove Cutter: Control joints are the unsung heroes of long-lasting sidewalks. Using a groove cutter, carve out these joints at strategic intervals. They act as pre-emptive measures, guiding any future cracks away from the surface and into the joint, thereby preserving the sidewalk's appearance and structural integrity.
- Final Inspection: Before the concrete fully sets, take a moment to inspect your work. Ensure that the surface is uniformly smooth, the edges are well-rounded, and the control joints are cleanly cut.
List of Common Mistakes to Avoid
- Skipping the Float: Neglecting to use a concrete float can result in a rough, unprofessional finish that's more susceptible to wear and tear.
- Ignoring Edges: Failing to properly edge the sidewalk can lead to chipping and may compromise the overall durability of the structure.
- Omitting Control Joints: The absence of control joints is an invitation for uncontrolled cracking, which can mar the appearance and weaken the structure of your sidewalk.
Step 6: The Art of Curing Your Concrete Sidewalk
Curing is not merely a waiting game; it's a critical phase in the life cycle of your concrete sidewalk. This process ensures that the concrete achieves its maximum strength and durability. But what does curing entail?
- Understanding Curing: Curing is the process of maintaining adequate moisture, temperature, and time conditions to allow the concrete to harden and strengthen. Concrete cures best at temperatures between 50°F (10°C) and 90°F (32°C). In colder climates, it's essential to ensure the concrete doesn't freeze during the curing process, as this can severely weaken it. In contrast, in hot climates, shading the concrete or using cool water can help control the temperature. It's not just about letting the concrete dry; it's about ensuring it sets in the best possible conditions.
- Initial Setting Time: While the concrete might seem firm to the touch within a few hours, it's essential to allow it to cure undisturbed for at least 24 hours before even thinking of removing the forms.
- Extended Curing for Durability: For those aiming for a sidewalk that stands the test of time, patience is key. Letting the concrete cure for up to a week can significantly enhance its durability and resistance to wear and tear.
- Moisture Retention: To prevent the concrete from drying out too quickly, which can lead to surface cracks, cover it with plastic sheeting. This sheeting acts as a barrier, helping the concrete retain the much-needed moisture during the curing process.
Step 7: The Finishing Touch: Seal and Revel in Your Achievement
With the curing process complete, you're on the home stretch. But there's one final step to ensure your sidewalk's longevity and resilience against the elements.
- Why Seal?: A concrete sealer acts as a protective layer, shielding your sidewalk from water infiltration, stains, and even the harmful effects of UV rays. It also enhances the concrete's appearance, giving it a polished look.
- Application: Ensure the concrete is clean and free from debris. Follow the manufacturer's instructions when applying the sealer, ensuring even coverage.
- The Fruit of Your Labor: With the sealer dry, take a moment to admire your handiwork. You've not just built a pathway; you've crafted a durable and aesthetically pleasing addition to your property. This concrete sidewalk, with its smooth finish and robust structure, is now ready to gracefully handle years of foot traffic, come rain or shine.
Final Thoughts
Installing a concrete sidewalk is definitely a weekend project for the ambitious DIYer. But if you'd rather leave it to the pros, consider hiring a professional. Either way, a well-installed sidewalk is a long-term investment in your property's curb appeal and functionality.
Happy building!